Resetting and Reprogramming io-homecontrol Shutters

We have Somfy io-homecontrol shutters in our home. These are generally excellent electric shutters that are built into the fabric of the house. As such, they are a critical part of the house and something I want to be able to understand and, ideally, fix myself.
We have had two incidents where a shutter failed to work properly and needed resetting. Both times the shutter lost track of the dimensions of the window. This caused the shutter to either not close fully, or to retract entirely into the housing above the window.
The first time was soon after the house was built, so we called the installers. They fixed the problem.
The second time was a couple of weeks ago. Thin ice had formed on the outside of a larger shutter. When the shutter retracted, the slats held together briefly before the ice broke. The shutter seemed confused by this slight jarring and retracted the slats entirely into the housing above the window.
We are now a few years after the last failure and I suspected calling the installers could result in an expensive bill; dealing with the shutters is time consuming and specialised work.
So, I wanted to fix the problem myself. One of the benefits of building your own home is knowing all the materials involved. There should be no surprises when it comes to home maintenance.
The fix was in two parts. The first part required the physically accessing the shutter and unrolling the slats back into the window guides. The second part required reprogramming the shutter’s upper and lower limits, to tell it the dimensions of the window.
The physical step was as you might expect. Doable but uncomfortable in the cold.
Reprogramming the shutter was less obvious. As with our home telephone system, I am writing this as a reminder to myself how to reset and reprogram our shutters. If this is helpful to others, great, but this is for poor unfortunate future me. The future me reading this will likely be upset, but grateful of the time I am spending now to document this process.
Specifics
This process is for the following equipment:
- io-homecontrol Shutter (such as Somfy RS100 and Oximo models);
- Smoove 1 io wall control;
- Easy Sun io remote.
Note that this does not cover older Radio Technology Somfy (RTS) based devices.
Mental Model
Having a mental model of how the various items work together is helpful.
The Shutter knows the following:
- an encrypted channel for communication;
- an upper limit;
- a lower limit;
- a My position;
- its current position.
The Shutter is a two-way device () and can both listen to and broadcast messages.
The Smoove 1 io wall control knows the following:
- an encrypted channel for broadcasting to.
The Smoove io control is a one-way device () and can only broadcast.
The Easy Sun io remote knows the following:
- multiple encrypted channels for communication.
The Easy Sun io is a two-way device () and can both listen to and broadcast messages.
Capability: io-1 and io-2
Look for the io-1 or io-2 marks on each io-homecontrol device. This mark indicates if the device supports broadcast only (one way) or full communication (two way) with other devices.
Accuracy
These descriptions are only a model, they help, but they are unlikely to accurately capture the actual design and implementation. Unfortunately the io-homecontrol implementation details are a commercial secret.
Resetting a Shutter
To affect a Shutter, it needs to be placed in a programmable state. In this state, controls can be paired and unpaired with the Shutter. In software engineering terms, this is the state when the devices handshake and agree the details for further encrypted communication.
Programmable State
Place a Shutter in a programmable state with these steps:
Power off the Shutter for 2 seconds, back on for 10 seconds, off again for 2 seconds, then leave the power on;
The Shutter will move a short distance or joggle; this indicates success.
Some models of Shutter move up or down a short way, and others joggle up and down briefly. Ours move a short distance, so be wary of it retracting back into the housing.
If this does not work. Try again. The Shutter is not blanked or reset. It has been placed in a programmable state and is receptive to pairing and unpairing. Nothing permanent has happened.
If a Controller has been previously paired, unpair it now. This will reset the relationship and let you start the process as if from new.
To exit the programmable state, power off the Shutter for a few seconds, then restore the power.
Timings
Nico Cartron’s Resetting your Somfy IO roller shutter article and motorise.it’s videos mention needing a three, eight, three second sequence of power cuts. These timings also work but I can not find official documentation for them. The Manuel de l’installateur 2010 - Somfy mentions 2, 10, 2 for my model and so those are the numbers I have been using. I suspect the accuracy of the timing is forgiving.
I presume the Shutter will exit this programmable state after some duration, such as fifteen minutes. This would be reasonable to avoid customer confusion after an unplanned sequence of power cuts that happened to match the 2, 10, 2 second sequence.
Isolating the Power
Being able to power on and off a Shutter requires isolating the device’s power from the rest of the house. If you toggle the power on and off for a group of shutters, they will all enter their programmable state and will act as a group.
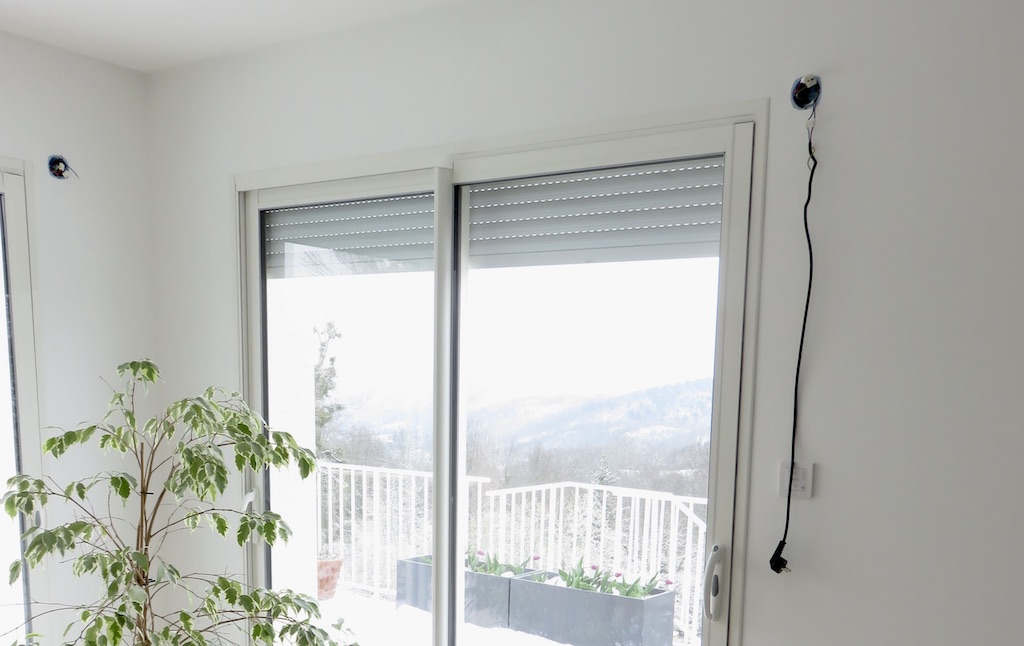
In our home, next to each shuttered window is an access cover. Behind these covers are the electrical connections for each shutter. This access can be used to isolate the shutter from the rest of the house. I can not advise anyone else how to perform this task; if you are unsure or uncomfortable with mains electrical wiring, please contact an installer or electrician to help.

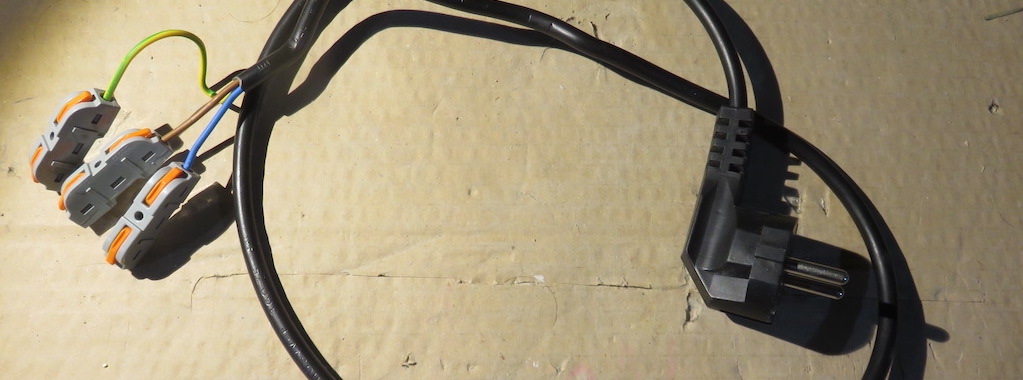
I created a cable with a plug on one end and three lever nut wire connectors on the other. This cable allowed me to safely disconnect the shutter from the mains and reroute the power through a wall socket – where I could toggle the power with a button.

The obstacle I faced was isolating the bathroom shutter. This shutter’s wiring had been tiled over and could not be accessed without removing wall tiles. Thankfully the bathroom was the only shutter that was not accessible on it’s electrical fuse.
To work around this problem, I disconnected all the other shutters and left only the bathroom shutter connected to mains power. I could then toggle the power at the fuse box, affecting only the bathroom shutter as the others were disconnected.
Pairing and Unpairing
At this stage, having put the Shutter in a programmable state, nothing permanent has happened. You can now either pair or unpair a Controller with the Shutter. You can also set the Shutter’s limits with a Controller.
Pairing the Shutter with another Controller will cause the Shutter to forget its relationship with the previous Controller. The Shutter only knows about one encrypted channel at a time. Multiple Controllers can communicate with a single Shutter or group of Shutters, but they all must share the same encrypted channel.
Unpairing a Controller
With a Controller previously paired with a Shutter:
Place the Shutter in a programmable state (power toggle described above: 2, 10, 2);
Press and hold the PROG button on the previously paired Controller until the Shutter moves twice.
The first Shutter move will be almost immediate; the second will happen about 7 seconds later.
The Shutter and Controller are no longer paired. The Controller has been reset; it has discarded the details of the encrypted channel. The Shutter is likely unchanged.
Pairing a Controller and Setting the Shutter Limits
These steps will both pair a Controller and set the Shutter’s limits:
Place the Shutter in a programmable state (power toggle described above: 2, 10, 2).
If a Controller has just been unpaired, the Shutter will remain in a programmable state.
Briefly press the Up and Down buttons on the Controller.
The Shutter will joggle to indicate the two devices have agreed an encrypted channel.
Press and hold DOWN to fully close the Shutter.
If the Shutter direction is inverted, press and hold My on the Controller until the Shutter joggles; the direction of Shutter will now be swapped.
With the Shutter fully closed, briefly press the Up and My buttons to confirm to new lower limit.
Be careful! The Shutter will move up and continue moving up. It will retract into the housing unless stopped.
Press My to stop the Shutter near the top. Use the Up and Down buttons to fully open the Shutter.
Briefly press the My and Down buttons to confirm the new upper limit.
The Shutter will begin closing. Press My to stop the Shutter at any position. This position is not important. The My limit can be set anytime and does not require the programmable state.
Press and hold My until the Shutter joggles. This confirms the new limits.
Press the PROG button on the Controller.
The Shutter will joggle and exit programmable state.
Test the Shutter limits by opening and closing the Shutter with the Controller. If something is not as expected, repeat these steps.
Pairing a Controller
These steps pair a Controller with a Shutter:
Place the Shutter in a programmable state (power toggle described above: 2, 10, 2).
If a Controller has just been unpaired, the Shutter will remain in a programmable state.
Briefly press the Up and Down buttons on the Controller.
The Shutter will joggle to indicate the two devices have agreed an encrypted channel.
Press the PROG button on the Controller.
The Shutter will joggle to indicate success and exit programmable state.
Pairing an Additional Controller
Place the Shutter in a promiscuous state. In this state, the Shutter will share the details of its existing encryption channel. Any device knowing these details can communicate with the Shutter.
On a paired Controller, briefly press the PROG button.
The Shutter will joggle to indicate it is in a promiscuous state.
On the Controller, briefly press the PROG button.
The Shutter will joggle to indicate success and exit promiscuous state. This could take a few minutes; the Controller has to search through the possible channels and wait for the Shutter to respond to its broadcast.
Test the pairing by opening and closing the Shutter with the new Controller.
Be careful! If multiple Controllers are in their programmable or promiscuous states at the same time, they will form a group. Uncoupling them requires resetting them all. It does not appear possible to remove a single io-1 () Controller from a group.
I am presuming it is the Shutter sharing the channel details with the additional Controller, and not the paired Controller. The paired Controller’s role is limited to broadcasting a message to the Shutter to be receptive to an additional Controller. I presume this because our controllers are io-1 () and can only broadcast; they do not maintain or know about the state of the Shutter.
Grouping Shutters with the Easy Sun io
We have an Easy Sun io remote control. This device allows us to group and control the shutters in our house as one. It is not an elegant solution nor are we using it entirely for its intended purpose. It is the device chosen for us by the installer.
Open the panel of the Easy Sun io remote. This exposes additional buttons.
Use the Left and Right buttons to select a group.
Press and hold the 123 button for 3 seconds to modify the selected group.
Use the Left and Right buttons to cycle through the paired Shutters.
The associated Shutter will joggle as it is selected.
Briefly press the 123 button to toggle the Shutter’s inclusion in the group.
Repeat the Shutter selection and toggling as desired.
Press and hold 123 for 2 seconds to confirm any changes.
Setting the My Position
The My position is a user preference; it is a position somewhere between open and closed. Typically, My is set to just a fraction before fully closed. The slats are open enough to let light through between each rung but no more.
The Shutter must not be in a programmable state.
Use Up and Down on the Controller to set the desired position.
Press and hold My on the Controller for 5 seconds.
The associated Shutter will joggle to indicate success.
Test the new setting by opening or closing the Shutter, then briefly pressing My.
The My position is stored in the Shutter and not the Controller.
Power Cut Saviour
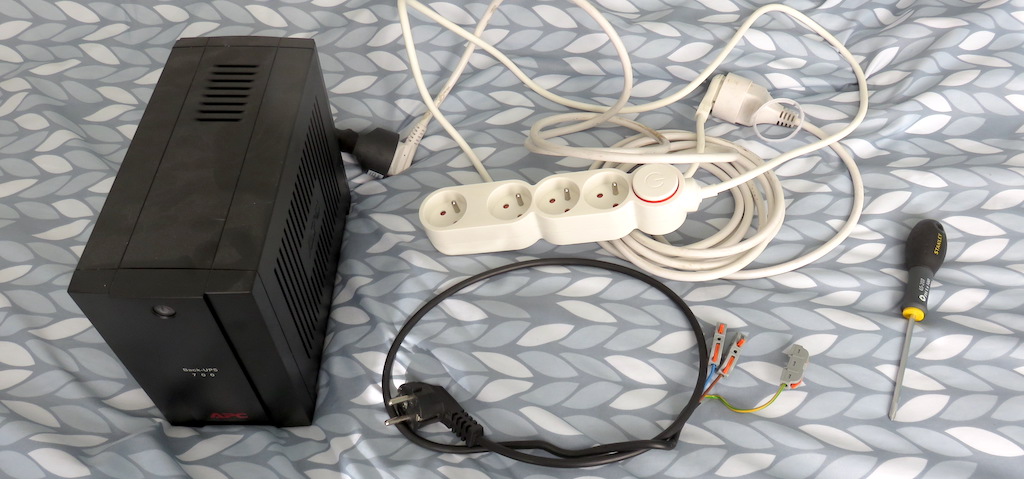
As an aside, having created the cable to isolate the power I discovered another benefit. During a recent power cut, I was able to briefly connect the bedroom shutters to an Uninterruptible Power Supply (UPS) and close the shutter. The UPS had enough power to do the job and we got to close a few critical shutters while the power was still out.

Technical Notes
A few notes about the technical implementation of io-homecontrol from the OpenHAB community may be insightful:
- io-homecontrol uses three radio frequencies: 868 - 870 Mhz (868.25 MHz, 868.95 MHz and 869.85 MHz).
- Offers a range of “at least 20 metres in a concrete building” and “this range can extend to at least 200 or 300” metres in the open.
- Protocol uses AES 128-bit encryption; 38.4 Kbps data rate.
Legal Notes
Somfy appear to have an antagonistic relationship with the web, see Hypertext Links, section 2. Links made by you, so I am not linking directly to the company’s web site. This attitude is unfortunate because it appears to limit discussion of their systems.
io-homecontrol, Somfy, Radio Technology Somfy, Easy Sun io, Oximo are all registered trademarks of their respective owners.