Making the Phone Vanish - Telephone Calls via an HT-503 and Raspberry Pi

Having spent two days fighting with my HT-503 box and telephones, I have achieved what I wanted. Two days ago I knew practically nothing about SIP, VoIP, Asterisk, and PSTN bridges. Now I can make landline calls to and from my computers.
I am now terrified that I will need to reconfigure my phones in the future and will forget everything I have struggled to achieve. Thus I am writing this for you, dear future me - and for you dear reader who has stumbled upon this hoping for answers.
Avoiding a Phone
We have a single landline connected to our house. This line is provided by our telephone provider and offers inclusive calls almost anywhere in the world. We use our landline to phone friends and family without worrying about call time or cost; everything is included in the monthly fixed fee.
We have a home network and a disliking of modern domestic landline phones. Home phones today pale in comparison to the cheapest mobile phones; so we decided to see if we could avoid them entirely.
Office phones are capable enough but ugly and fairly expensive. Researching office phones lured me into the world of Power over Ethernet (PoE) phones and Session Initiation Protocol (SIP) connected phones.
Ideally, we wanted to avoid needing a physical phone. A physical phone would mean having a single location to keep the phone in the house. It would be another item plugged into a wall and it would mean dedicating a prized network socket to a single purpose item, a phone.
Maybe we could use our computers as phones? They have speakers and microphones. Why not also use our trusted iPod Touch as a phone? Surely this was possible.
This led me down the path of SIP, Asterisk, and ATAs.
HT-503 - Bridging the Landline and Network
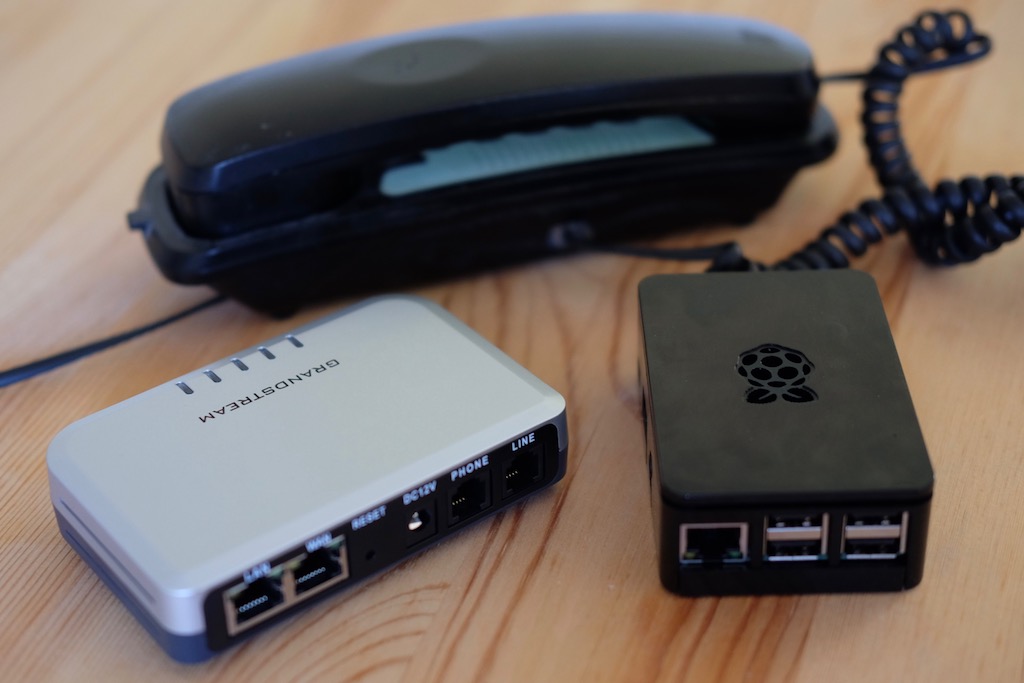
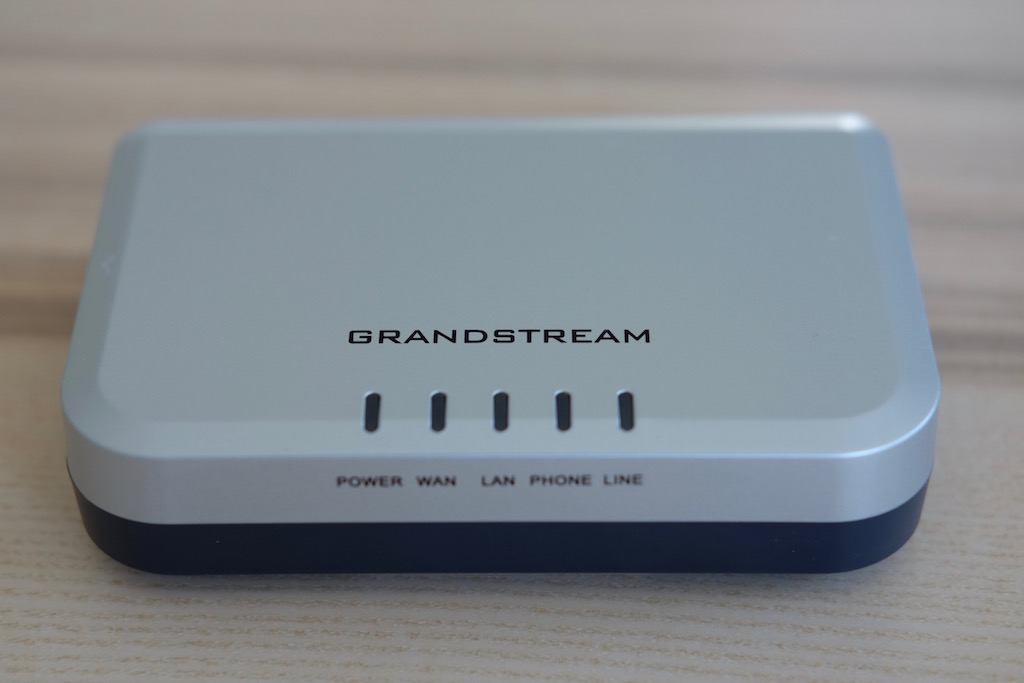
For the same cost as an office phone, or less, you can buy a Grandstream Networks HT-503 FXO/FXS Analog Telephone Adaptor (ATA). This small box of electronics can bridge the divide between a landline phone and a computer network.

When researching these bridging boxes, the trick is to look for an FXO port. This is the physical port you need to connect to an existing phone line provided by your telephone company.
Small boxes with FXO ports are far less common than boxes with the corresponding FXS ports. It is easy to become confused between the two similarly named ports.
So I bought a Grandstream HT-503 a couple of weeks ago for around fifty-five euros. The box is reasonably small, had the physical ports I needed, and has a feel of early twenty first century industrial design about it. The web interface is enough but it might be best to lower your expectations around ease of use.
Having checked the box powered on and seemed responsive, I took one look at the myriad of options, realised I was out of my depth, and put it aside for a couple of weeks.
What I Wanted
I wanted the following:
- to be able to make phone calls from our computers through our landline connection;
- to be able to answer incoming landline phone calls from our computers;
- to have a working physical phone always connected for emergencies;
- to be able to use software based phones, aka soft phones;
- support for SIP devices in case we needed an office phone.
I did not care about:
- being able to make outgoing VoIP calls to outside of the house;
- being able to receive incoming VoIP calls from outside of the house;
- being able to send or receive faxes.
What I Had - Equipment and Hardware
I had the following hardware:
- a landline phone connection (RJ11 connection)
- an ethernet network (RJ45 connections)
- a Grandstream Networks HT-503 (RJ11 and RJ45 connections)
- a Raspberry Pi 2 computer
- an old home phone handset
What I Did - Setting up Phone Network
So this weekend, I set aside some time and threw myself into solving the home phone problem.
These are the steps I took to reach a working network based home phone system. The result works but is not the final configuration.

Set up Asterisk on Raspberry Pi with Debian
In my experiments I tried Asterisk for Raspberry Pi but found the FreePBX web interface too complex and overwhelming. I was more productive installing Asterisk on the Raspberry Pi’s lite image of Debian.
Debian Stretch Lite
Debian is a flavour of the open source and free Linux operating system. I chose Debian because it is the official operating system provided by the Raspberry Pi project; other Linux flavours exist and are probably just as good.
- Download Raspbian Stretch Lite;
- Expand Raspbian
.zipfile to get the final.imgfile.
At the time of writing, the download version was:
Minimal image based on Debian Stretch
Version:September 2017
Release date:2017-09-07
Kernel version:4.9
Copy the image onto your Raspberry Pi’s microSD card, see installing images. On macOS:
- Format the microSD card as FAT using Disk Image;
- Note disk id of mounted card, in my case this was
disk8; - Copy the image onto card using the Terminal command, using the appropriate disk id:
sudo dd bs=1m if=2017-09-07-raspbian-stretch-lite.img of=/dev/rdisk8 conv=sync - Enable
sshaccess, see Remote Access > Secure Shell:touch /Volumes/boot/ssh - Place the microSD card into the Raspberry Pi and power it on.
Set up the Raspberry Pi
sshinto Raspberry Pi as the default userpiwith default password ofraspberry; find the IP address of the device via the switch or DHCP server.- Change the default password:
passwd - Reclaim any spare microSD card space using
raspi-config: Advanced > Expand Filesystem > Reboot:sudo raspi-config - Update Debian’s core software:
sudo apt-get upgrade - Install
ntp(Network Time Protocol) for accurate system time:sudo apt-get install ntp sudo /etc/init.d/ntp restart
Asterisk on a Raspberry Pi
Asterisk is an open source and free software based Private Branch Exchange (PBX). It is Asterisk that will handle the computers on the network and the calls coming in from and going to the HT-503.
- Install Asterisk on the Raspberry Pi:
sudo apt-get install asterisk
All the server software we need is now installed and ready to set up.
I started simply with Asterisk and have not gone much further than getting two extensions up and running with the landline. I followed the examples at A simple PBX system in The Asterisk Book to achieve this.
Asterisk is huge and complex. I deferred to the defaults in almost every case. I put aside the originals and started with blank files for the sip.conf and extensions.conf files:
cd /etc/asterisk
sudo mv sip.conf sip.conf-orig
sudo mv extensions.conf extensions.conf-orig
sudo touch sip.conf
sudo touch extensions.conf
These commands change into the folder, cd, containing all the Asterisk configuration files. Then the two key configuration files are renamed, mv, to remain safely available but out of the way. Two blank files are then created, touch, to take their place.
Within /etc/asterisk/sip.conf I created four extensions:
- 2000
- 2001
- ht503fxo
- ht503fxs
An extension is effectively a phone within the telephone system. 2000 and 2001 are from the Asterisk examples I followed and dedicated to soft phones on our computers. You can dial 2000 on the house phone and the computer or device within the house will ring.
The two ht503fxo and ht503fxs are extensions for the HT-503 to use. Numerous configuration guides suggested that an extension (SIP account) for the HT-503 was not required, or more strongly, must not be configured. I did not find this to be the case. Doug Crompton’s Replacing a Sipura SPA-3000
with a Grandstream HT-503 provided the first hint that this advice was misguided.
The complete /etc/asterisk/sip.conf file:
port = 5060
binaddr = 0.0.0.0
context = others

[2000]
type=friend
context=my-phones
secret=1234
host=dynamic

[2001]
type=friend
context=my-phones
secret=1234
host=dynamic

# 503fxo
type=peer
username=ht503fxo
secret=something
canreinvite=no
insecure=very
host=dynamic
nat=no
port=5062
disallow=all
allow=alaw
allow=ulaw
dtmf=rfc2833
qualify=yes
context=my-phones

# 503fxs
type=friend
username=ht503fxs
secret=something
host=dynamic
insecure=very
nat=no
dtmf=rfc2833
port=5060
canreinvite=no
disallow=all
allow=alaw
allow=ulaw
qualify=yes
context=my-phones
The complete /etc/asterisk/extensions.conf file:
# my-phones
exten => 2000,1,Dial(SIP/2000,20)
exten => 2001,1,Dial(SIP/2001,20)

exten => _XXXXX.,1,Dial(SIP/ht503fxo,60,D(w${EXTEN}))
exten => _XXXXX.,n,Hangup()
The extensions are trivial in our case. The two internal extensions, 2000 and 2001, map to SIP accounts.
The final extension is a pattern _XXXXX. that matches any 6 or more digits. Matched calls are then passed to the HT-503 via SIP. The format of the Dial(SIP/ht503fxo,60,D(w${EXTEN}) is interesting and differs from some configuration guides. The line says, dial the ht503fxo, and then after connecting, dials ${EXTEN}. The w waits a couple of seconds.
I saw guides suggesting the format Dial(SIP/ht503fxo/${EXTEN}) but this did not immediately work for the HT-503. I suspect more experiments would reveal a better approach.
This Asterisk configuration is simplistic and likely needs hardening for security. In particular, I believe the context of the HT-503 extensions need attention. I also suspect some of the HT-503 key value pairs can be removed. For now though, it works.
Asterisk Hints
Use sudo asterisk -rvvvvvc to connect to a running instance of Asterisk. The extra verbosity is essential for debugging.
Set up the HT-503 for Asterisk
With the Asterisk server set up and running, I turned my attention to the HT-503. Discovering the appropriate settings for this box has been time consuming.

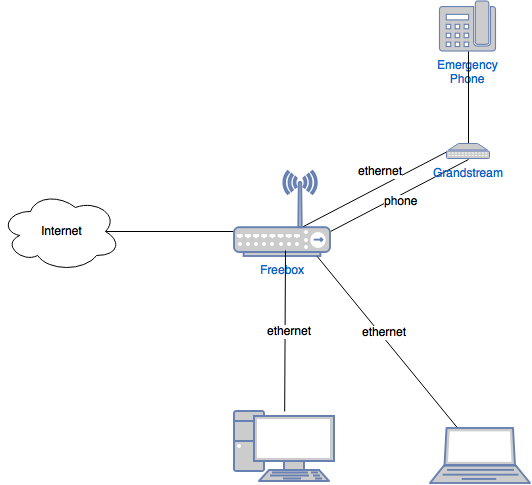
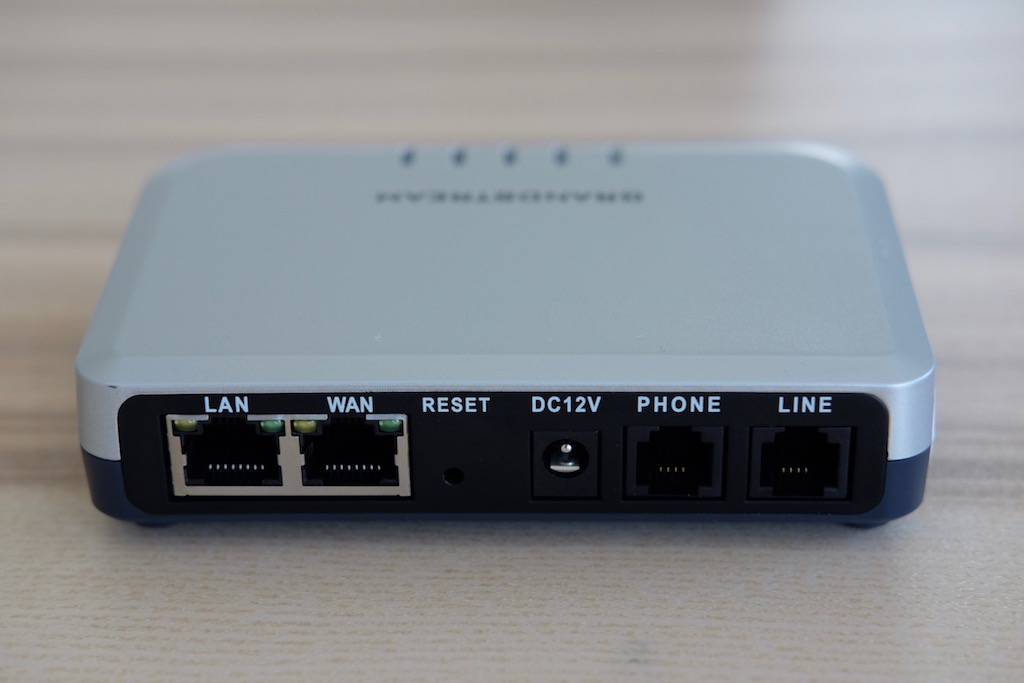
Plug in:
- Plug nothing into the LAN port
- Ethernet cable into the WAN port
- Power into DC12V
- Physical telephone into Phone port
- Telephone line from wall into Line port
HT-503 Network Settings
Connect the HT-503 to the switch via the WAN port. Then use the physical phone connected to the HT-503 to enable WAN access to the web interface:
- Dial **** (menu) > 12 (WAN access) > 9 (toggle to enable)
Reboot the HT-503:
- Dial **** (menu) > 99 (reboot menu) > 9 (reboot)
My network is simple. The HT-503 is plugged into a switch. The network already has a DHCP server handing out IP addresses. The HT-503’s support for both local and wide area networks is not needed; let’s turn that off.
Basic Settings
- Telnet Server: No
- Device Mode: Bridge
- WAN side HTTP/Telnet access: Yes
HT-503 Country Specific Settings
A telephone line’s behaviour is country specific. That means the following section is only relevant as a guide to what needs change but not what to change the values to.
My HT-503 is in France connected to a French landline. I need to change the box to behave appropriately for France.
Basic Settings
Time Zone: GMT+01:00
Advanced Settings
- Dial Tone:
f1=440@-10,f2=0@-10,c=0/0; - Ringback Tone:
f1=440@-10,f2=0@-10,c=150/300; - Busy Tone:
f1=440@-10,f2=0@-10,c=50/50; - Reorder Tone:
f1=440@-10,f2=0@-10,c=50/50;
These lines tell the HT-503 what to expect for dial tones in France. I found the Interface Technical Specifications for France Telecom and Operational Bulletin No. 781 (1.II.2003) and Annexed List: Various tones used in national networkshelpful in crafting these. I am unsure about the volumes but -10 seems to work.
FXS Port
- SLIC Setting: France
FXO Port
- FXO Termination > PSTN Disconnect Tone:
f1=440@-30,f2=440@-30,c=50/50; - FXO Termination > Country-based: France
You may find the PSTN Disconnect Tone does not work for your set-up. If this happens, try: f1=440@-30, f2=440@-30, c=500/500;
HT-503 Asterisk Settings
With the network and country specific settings applied, the HT-503 is ready to connect to the Asterisk server.
Basic Settings
- Unconditional Call Forward to VOIP: 2000 / ip.address.raspberry.pi / 5060
This setting tells the HT-503 to forward all incoming calls from the landline (PSTN) to the specified SIP account. In this case the account is for extension 2000 on our Asterisk server. This means any phone connected to the Asterisk server will ring when someone phones your home landline.
FXO Port
- FXO Termination > Number of Rings: 2
- FXO Termination > Impedance-based: Yes
- FXO Termination > PSTN Ring Thru FXS: No
- Channel Dialing > Stage Method (1/2): 1
This reduces the number of rings before the HT-503 picks up incoming calls. Two rings is enough for caller identification information to be collected by the HT-503 and passed onto the Asterisk server. You can reduce the number of rings to zero but you may loose Caller ID support.
By the time your computer’s soft phone rings, the caller will have heard two or three rings. This is because the HT-503 consumes the first two rings and only then starts sending the call to the network.
I am not convinced Impedance-based is needed.
The PSTN Ring Thru FXS determines whether a physical phone connected to the HT-503 rings when an incoming call arrives. I want only the computers to make a sound when calls come in, so I have disabled the physical phone from ringing.
Stage Method is critical. This setting determines how the HT-503 expects external numbers to be dialled. By default the HT-503 is configured to expect a two stage dialling process. The first stage is to dial the registered SIP account, ht503fxo. The caller will then hear the external dial tone. Only then is the external number called and this is referred to as stage 2.
We want to be able to dial our external number in one step. Our soft phone should only need to dial the external number. It is then the responsiblity of Asterisk and the HT-503 to cooperate. With Stage Method set to 1 this is what we get. Remember the Dial(SIP/ht503fxo,60,D(w${EXTEN})) in extensions.conf? This line connects to the HT-503 and immediately asks for the HT-503 to dial out the number we initially dialled.
If you wanted to be able to dial to just an external line, this is possible with:
exten => 2003,1,Dial(SIP/ht503fxo)
With this line in /etc/asterisk/extension.conf, a call to 2003 would end up hearing the dial tone of the external landline. From there you could dial a number on the keypad to connect elsewhere.
HT-503 SIP Settings
The SIP accounts on the HT-503 connect to the Asterisk server. The names of the accounts is deliberate the will hopefully ease pairing of the right port with the right account.
FXS Port
- Account Active: Yes
- Primary SIP Server: ip.address.raspberry.pi
- Outbound Proxy: ip.address.raspberry.pi
- SIP User ID: ht503fxs
- Authenticate ID: ht503fxs
- Authenticate Password: 1234
- SIP Registration: Yes
FXO Port
- Account Active: Yes
- Primary SIP Server: ip.address.raspberry.pi
- Outbound Proxy: ip.address.raspberry.pi
- SIP User ID: ht503fxo
- Authenticate ID: ht503fxo
- Authenticate Password: 1234
- SIP Registration: Yes
Reboot and Test
Congratulations on getting through all those settings. It is now time to reboot the HT-503, for luck, and start testing the phones work as desired.
Update: I upgraded to a Synology DiskStation in place of the Raspberry Pi. See how to set up Asterisk with Docker on a NAS.